Building MonoDevelop for the PINE64

MonoDevelop running on the PINE64 using SSH X11 forwarding

4 Dec 2017 Update
These instructions will not work with the latest versions of Mono and MonoDevelop from github. I tried compiling from scratch on a new image, and they will work with the following versions listed below. You can checkout the specific tags immediately after cloning the corresponding repositories before you start building.
Mono 4.8.1.0 – git checkout tags/mono-4.8.1.0
MonoDevelop 6.1.0.5441 – git checkout tags/monodevelop-6.1.0.5441

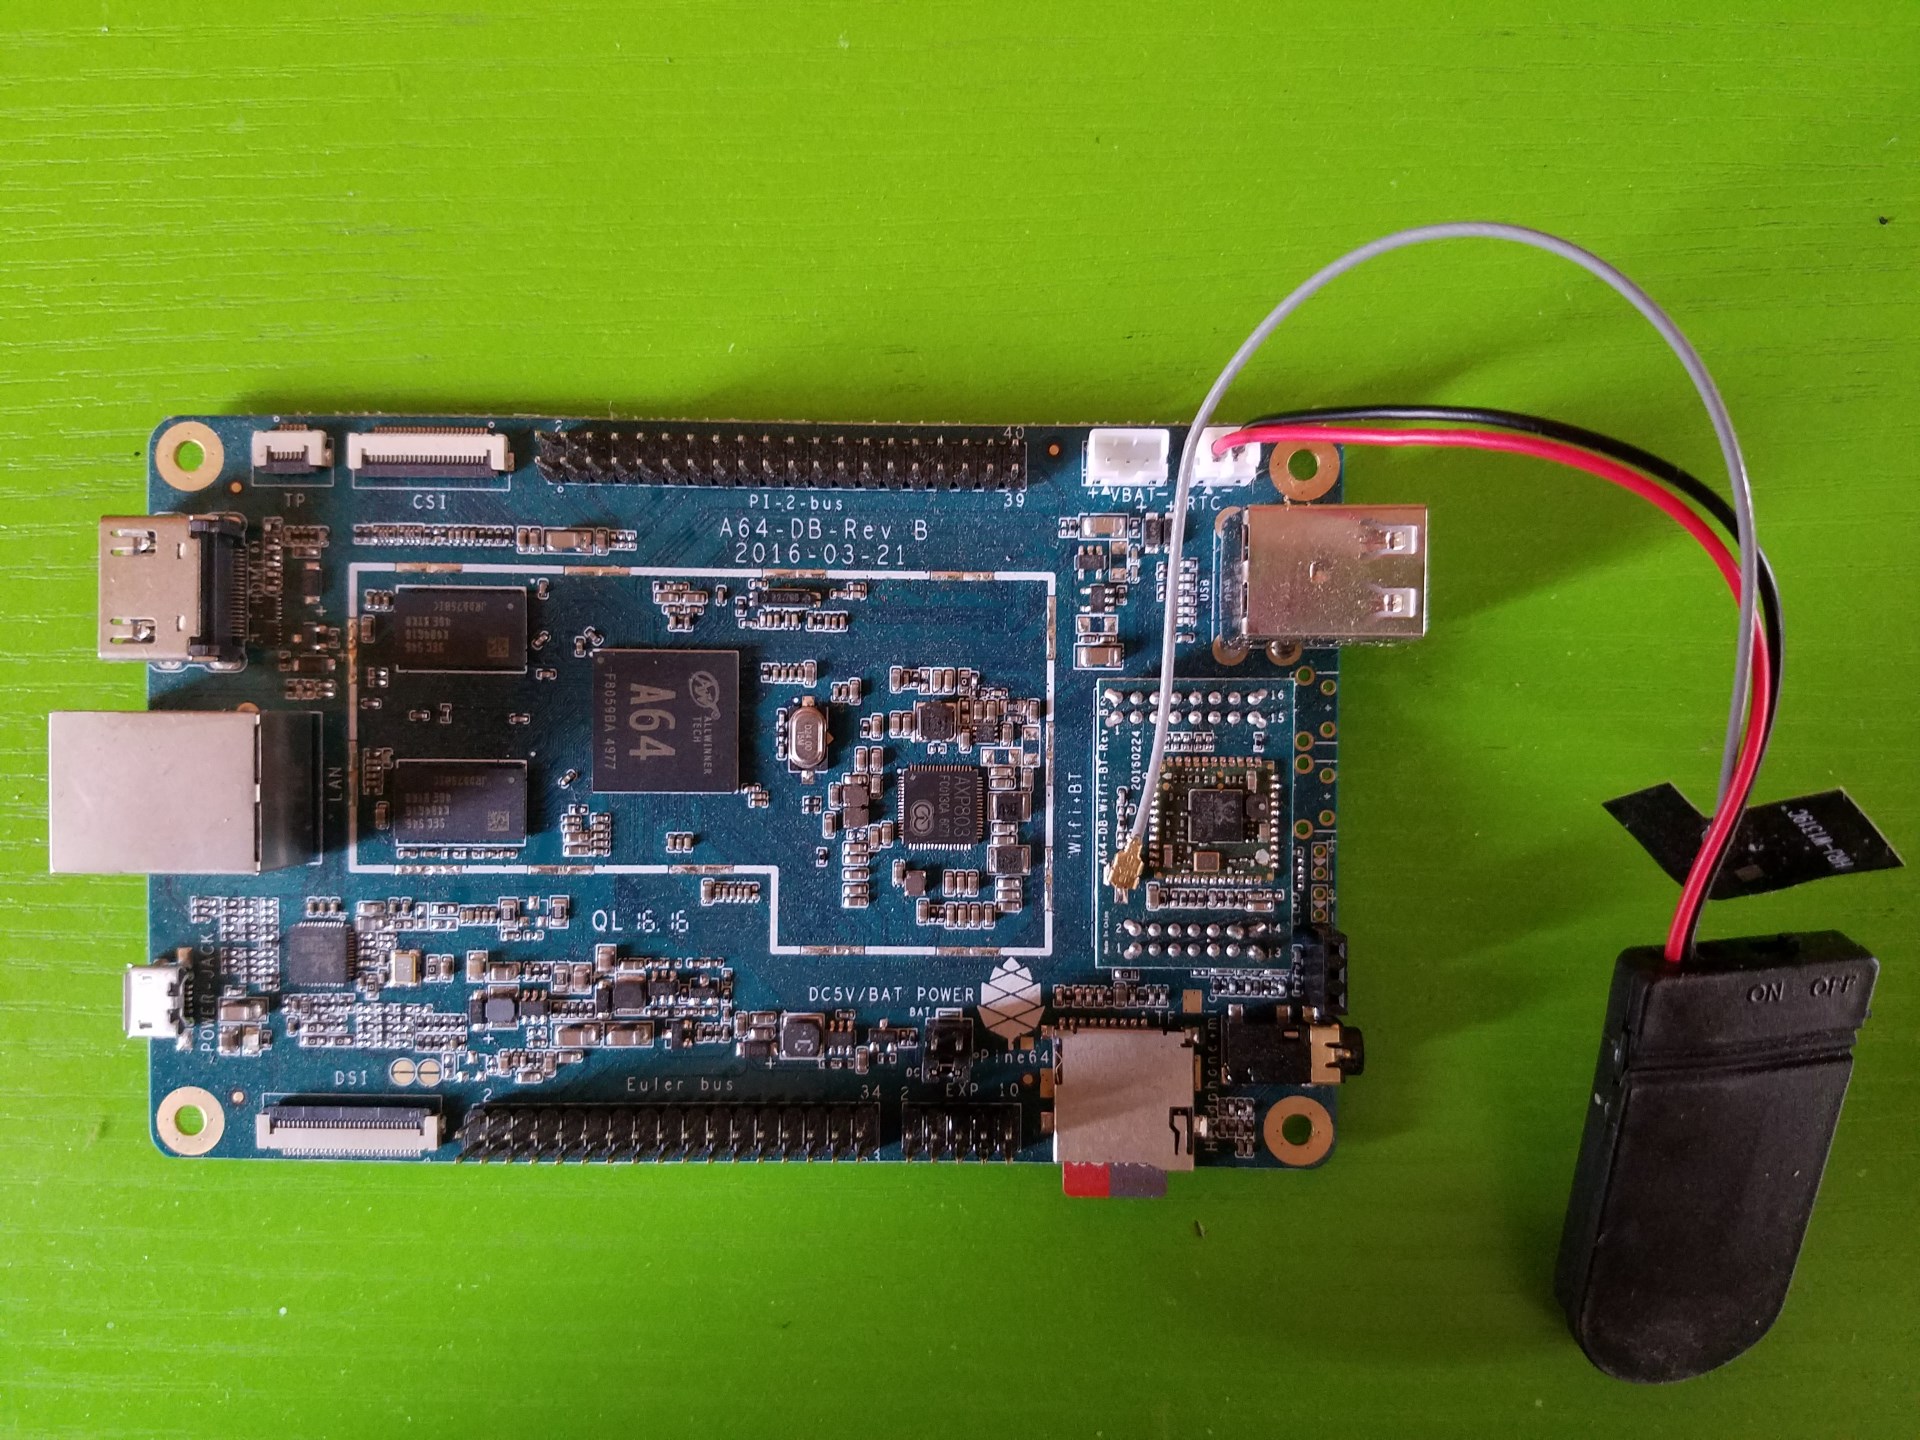
My PINE64 is here and the first thing I decided to do was build MonoDevelop which I’ll use to manage C# projects, since most of the code I’ll be writing for my autonomous project will be in C#. I’m using the longsleep Ubuntu Xenial image as a base, so these instructions assume that this is what you have installed. You can adapt as required based on your distro.

Of course, the easiest way to get MonoDevelop installed is by using the package manager. The version is also fairly recent (4.2.1.102), so you can choose skip the rest of this post if you prefer. Simply run the apt-get install command and all required dependencies will also be automatically installed.

Most of the steps will be similar to the MonoDevelop for Raspberry Pi build post, but we’ll be skipping fsharp altogether. I cloned the fsharp repository but the make process failed due to the following error:

F# is only required for the fsharpbindings extension and I don’t plan on using that. There appears to be an fsharp package which you can install using apt, but this will also install the mono 4.2.1 dependencies. If you’re fine with using an older version of mono and would still like to build MonoDevelop, then you can also skip the steps up till Build MonoDevelop.

So let’s get started!

Install all prerequisites
Git is required to clone the source repositories for Mono, MonoDevelop and dependencies. The other packages are required for building MonoDevelop dependencies from source.


Pre-build: NuGet certificates
The MonoDevelop build process makes use of NuGet at certain points. You will need to import certificates into your certificate store using the following commands.


Build Mono
This step is fairly straightforward. Clone the mono source repository and run the build process.

This build will take a while. If you wish to run the mono and mcs test suites, you can do a make check before make install.
 

Build MonoDevelop dependencies
MonoDevelop requires gtk-sharp and gnome-sharp to be installed on the system. To build gtk-sharp.

gnome-sharp follows a similar process.

Some reference PCL Assemblies are required for the build to complete. You will need to build a deb package and install following the instructions below.

Remove mono-xbuild from the list of dependencies in the control file, save and close. Then proceed with the following commands.


Build MonoDevelop
First, we clone the monodevelop repository and initialise the submodules using git.

Next, we remove references to fsharp. The assumed working directory for these steps is the top-level monodevelop source directory.

Remove the external/fsharpbinding/MonoDevelop.FSharpBinding/FSharpBinding.addin.xml \ line, save the file and close.

Comment out or remove the following lines in the file and save your changes. To comment out the lines, simply prefix each line with the # character.

Then we can go on to build the IDE.

You can run mono main/.nuget/NuGet.exe update -self if you get the following error after running make.

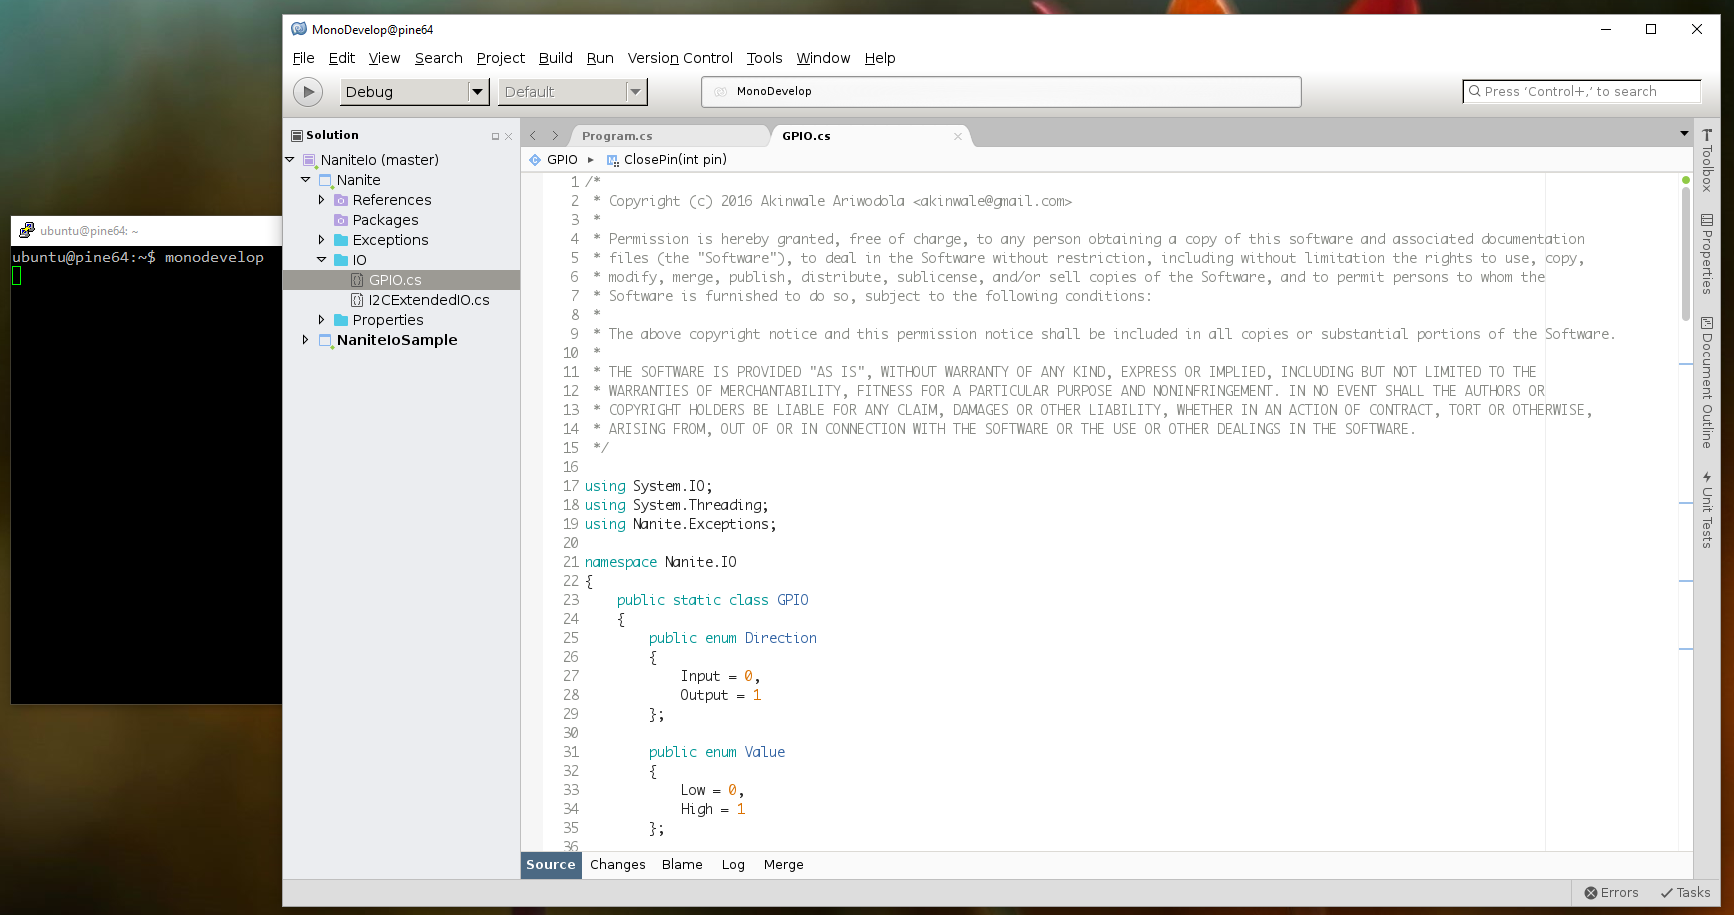
Once the build is successfully completed, you can run the application using monodevelop. If you have X11 forwarding enabled for your SSH session, you should see the MonoDevelop IDE on your screen after a couple of seconds.

MonoDevelop running on the PINE64 using SSH X11 forwarding

MonoDevelop running on the PINE64 using SSH X11 forwarding

The PINE64 is finally here

1GB PINE64 with the WiFi module and RTC battery module installed. It's huge!

I received my PINE64 yesterday and I was pretty excited after such a long wait. The following items were in the package:

  • PINE64 1GB board
  • Camera module
  • RTC battery module (which is actually bigger than I expected)
  • WiFi/Bluetooth module

They were all in good shape, and the board was not bent nor warped which I was afraid would happen after reading a few horror stories. The Pine64 is most definitely a huge board (compared to the Raspberry Pi), and the build quality also seems solid. I was able to burn the longsleep Ubuntu Xenial image to a 32GB microSD card, and since I wanted to run the board as a headless device, I mounted the microSD on my Linux box and updated the /etc/network/interfaces file to connect to my wireless network. The connection to the network was established a few seconds after providing power to the board and I was able to SSH into the device after the boot process was successfully completed.

I’ll update this post with a few pictures once I get a decent camera.

Update

1GB PINE64 with the WiFi module and RTC battery module installed. It's huge!

1GB PINE64 with the WiFi module and RTC battery module installed. It’s huge!

PINE64 side-by-side with a Raspberry Pi 3 and the Keyestudio Mega clone

PINE64 side-by-side with a Raspberry Pi 3 and the Keyestudio Mega clone

Building Visual Studio Code for the Raspberry Pi 3

If you’d rather prefer to use Visual Studio Code for C# development instead of MonoDevelop, you can build Microsoft’s own Visual Studio Code from the source repository. I’ve used Visual Studio Code on Ubuntu and it’s actually a pretty neat tool for developing on Linux. It supports over 30 languages including C#, C++, Python, Java and more, so even if you’re not writing C# code, it’s still a useful tool.

Prerequisites for the build on Linux include Python 2.7, make and libx11-dev which should already be installed on your Pi if you started of with a Raspbian Jessie image. Also, if git has not been installed yet, run sudo apt-get install git. Nodejs and npm also need to be installed, as they will be used by the build script to retrieve some required packages. A recent version of nodejs has to be downloaded since the package version in the repository is not adequate.

Install required dependencies for running Visual Studio Code.

Let’s clone the repository and start the build process.

If you get an error like so:

edit npm-shrinkwrap.json and delete the following lines.

Once the build is completed, you can run:

The script will download a few more required files and perform a few initialisation steps before the IDE launches. The editor performance was very poor when I ran it using X11 forwarding however. Perhaps, it works better if running within a native X11 display.

Visual Studio Code running on the Raspberry Pi 3 using X11 forwarding

Visual Studio Code running on the Raspberry Pi 3 using X11 forwarding

How to control GPIO pins on the Raspberry Pi 3 using C#

GPIO pins on the Raspberry Pi can be controlled using the sysfs interface, which is a virtual filesystem that the Linux kernel provides. In this guide, we will write a basic C# class to control available pins on the Pi through sysfs.

Understanding the sysfs interface
sysfs provides access to the GPIO pins at the path /sys/class/gpio. You can cd into this path and ls to list files in the directory. There are two special files here which are export and unexport. You write to the export file to activate a particular pin, while writing to unexport deactivates the pin. The following example activates GPIO pin 18.

You can verify that the pin is activated by listing the files in the /sys/class/gpio directory. You should see a gpio18 folder in the directory listing. After the pin has been activated, you should specify whether the pin should be an input or output pin before you can read or write values. You do this for input like so:

Or for output:

If the pin is specified as an output pin, you can write a value of either 0 (low) or 1 (high) for the pin. If a LED is connected to the pin for this example, a value of 0 will turn the LED off, while a value of 1 will turn the LED on. To specify the pin value, you can do this:

Once you are done with the pin, you can deactivate it using:

Writing the C# class
Now that we have an idea of how sysfs works, we can create a class to implement the necessary steps. The sysfs approach basically requires writing values to the file, so we can use simple file I/O operations to achieve the desired result. The full listing for the GPIO class can be found at https://gitlab.com/akinwale/NaniteIo/blob/master/Nanite/IO/GPIO.cs.

The first thing we’ll do is add the using statements for the namespaces. System.IO is required for FileStream, StreamReader and StreamWriter which are used for file I/O. System.Threading is required for the Thread class, while Nanite.Exceptions contains the custom exceptions defined for our project. We’ll also define enumerations for the GPIO direction and value, and a few constants for strings like the GPIO path and other special files. The class will be defined as static, because we do not need to create an instance of the class.

Pretty straightforward so far. The first method we’re going to define is the PinMode method, which will take the pin number and direction as parameters. This method will activate the pin and then set the direction to either in or out depending on the specified parameter value.

We build the pinPath string making use of Path.Combine(GPIOPath, string.Format("gpio{0}", pin));. If the value specified for the pin parameter is 18, pinPath will contain the string, "/sys/class/gpio/gpio18". The ClosePin method call is optional, but the idea behind this is that the pin should be deactivated first before activating. We also check if the gpio pin directory exists using if (!Directory.Exists(pinPath)) before activating to make sure we are not activating a pin that has already been activated.

After the request for pin activation, there may be a small delay which is why we have a while loop which waits until the corresponding gpio pin directory has been created before we set the pin direction. Thread.Sleep(500) makes the program wait 500 milliseconds before proceeding to the next statement. Note that this while loop is completely optional, but it acts as a safeguard against setting the pin direction before the gpio pin directory has been created by the system. One thing to take note of is if the gpio pin directory never gets created (for instance, if the pin is invalid), the loop may end up running forever. To fix this, we can set a maximum number of times the loop should run before ending the loop.

The next method is the ClosePin method which takes the pin number as a parameter. This method checks if the pin directory exists before it writes the pin number to the /sys/class/gpio/unexport file.

We create the Write method to write a value to a pin. It takes two parameters, the pin number and the value which is of the Value enumerator type with possible values Value.Low or Value.High. In this method, we make use Path.Combine to create the full path to the value file in the gpio pin directory. For pin 18, this will be "/sys/class/gpio/gpio18/value". If value for the value parameter is Value.Low, we write 0 to the file, otherwise if it’s Value.High, we write 1 to the file.

Finally, we have our Read method to read a value from a pin. It will return either Value.Low or Value.High depending on what the pin has been set to. The question mark at the end of the method return type indicates that we can return null for the method if the value retrieved is invalid.

To determine if the retrieved value is valid, we add a couple of checks in the method. The first is the int.TryParse method, which returns false if the retrieved value is not a valid integer. Then verify that the value is either 0 or 1 using if (pinValue != 0 && pinValue != 1). If it’s neither 0 nor 1, null is returned. Otherwise, the corresponding enumeration value is returned by casting the integer to GPIO.Value.

Finally, we can put this all together in a sample program. If a LED is connected to pin 18, the LED will light up when the value is set to High and turn off when the value is set to Low.

Source Code
The full code listing for the GPIO class can be obtained from https://gitlab.com/akinwale/NaniteIo/blob/master/Nanite/IO/GPIO.cs.

Building MonoDevelop for the Raspberry Pi 3

4 Dec 2017 Update
I ran into some issues building the latest github versions of Mono and MonoDevelop on the PINE64, and I guess the same may apply here. If you encounter any difficulty building either Mono or MonoDevelop, you can try using the specific versions listed below. You can checkout the specific tags immediately after cloning the corresponding repositories before you start building.
Mono 4.8.1.0 – git checkout tags/mono-4.8.1.0
MonoDevelop 6.1.0.5441 – git checkout tags/monodevelop-6.1.0.5441

Since I will be using C# for most of my development (with a combination of C for some native system functionality), I decided to go with Mono. This guide is based on the assumption that you’re running the May 2016 Raspbian Jessie Lite image. The easiest way to get MonoDevelop up and running would be to run sudo apt-get install monodevelop which would also handle all the necessary dependencies including the Mono runtime. However, the versions in the repository are pretty old, and I want to be able to make use of .NET 4 features.

Another option for .NET development on Linux is .NET Core. Version 1.0 was officially announced by Microsoft a few days ago, but there aren’t ARM binaries available and I haven’t been able to successfully build it for the Pi, yet.

Git
The Mono project code is hosted on Github, so the first thing to be done is to install git.

Build Mono
Obtain the source code from the Github repository using the command

Then install the Mono build process prerequisites.

You can follow the build instructions in the README.md for the repository at https://github.com/mono/mono/blob/master/README.md. To summarise, change to the source root directory (cd mono) and run the following commands.

If you wish to run the mono and mcs test suites, you can do a make check before make install. The build will take quite a while, so you have to be patient. I didn’t time my build, but my best guess would be about 3 to 4 hours.

Build FSharp
MonoDevelop apparently requires the F# compiler to be installed. First thing to do is to import trusted root certificates required by the NuGet package manager into the machine store. The NuGet package manager retrieves certain required packages as part of the build process, so this is required.

Next, we clone the FSharp git repository and build.

Build additional MonoDevelop dependencies
MonoDevelop also requires gtk-sharp and gnome-sharp to be installed on the system. The first step is to install the rest of the apt dependencies for all three packages.

devscripts will be used to create a package of PCL Assemblies which is required for the MonoDevelop build process.

Once the dependencies have been installed, gtk-sharp should be built first and then gnome-sharp.

To build gtk-sharp

And gnome-sharp

Build MonoDevelop
If you made it through all of that, you can finally proceed to build MonoDevelop. But there are a few caveats which we’ll cover in a bit.

The first error I encountered after I running make was an issue with NuGet not finding a number of packages. To fix this while your current directory is the monodevelop directory, run the following commands and then run make again (if you’ve run it previously).

The next error stated that certain PCL Assemblies were missing. To sort this out

Remove mono-xbuild from the list of dependencies in the control file, save and close. Then continue with the following commands.

The final error had to do with the fsharpbinding regarding missing references in a particular assembly. Since I don’t need the F# bindings, and it’s not a required feature, I removed it from the build process using the following steps (assuming the monodevelop source directory is the working directory).

Remove the external/fsharpbinding/MonoDevelop.FSharpBinding/FSharpBinding.addin.xml \ line, save the file and close.

Finally, you can build and install.

This build will also take a bit of time, so sit back, relax and rest easy. Once the installation is complete, you can simply run it by typing monodevelop at the command line (assuming you have X11 forwarding enabled in your SSH session).

Getting started with the Raspberry Pi 3

It’s taken quite a while for my PINE64 to arrive. Apparently, the shipping was delayed because the addon camera module was not ready yet. Quite disappointing, but I guess it’s to be expected since it’s a Kickstarter project. In the mean time, I decided to grab a Raspberry Pi 3 so that I could start off with my autonomous robot project.

I started off with the Raspbian Jessie Lite image which is a 292MB download (May 2016 version). Got it set up on a Sandisk 32GB microSD card and booted it up. I was planning to connect to it using a USB to TTL serial cable as I don’t have any USB peripherals available, nor an Ethernet cable. The plan was to configure the wireless connection so that I could SSH into it (and use X forwarding for GUI applications) once it booted. This did not go smoothly, and it took quite some time to figure out since a lot of the information online only applies to the earlier Pi models.

It turns out the default Raspbian image for the Pi 3 does not support serial connections out of the box due to the in-built Bluetooth module, so I had to make some adjustments to get this to work. Hence, this is sort of a beginner’s mini guide to working with a headless Raspberry Pi 3. The following instructions will require a Linux box.

So how do you get Pi 3 serial to work?
Note that these instructions are based on the May 2016 Raspbian Jessie Lite image. I mounted the SD card on my laptop’s Ubuntu installation, and had to chroot into it (following instructions at https://hblok.net/blog/posts/2014/02/06/chroot-to-arm/) to run a few updates. Inserting the SD card will create 2 mount points: the /mnt/boot/ partition and the main partition which we’ll refer to as /mnt/main/ (note that the path to the mount points may be different depending on your Linux distribution, so verify). After mounting, run the following commands.

Before you can chroot, you need to be able to run ARM binaries using qemu.

Next, register the ARM executable format with the QEMU static binary.

Now, you can chroot into /mnt/main

If you get an error stating that ‘/bin/bash’ was not found, you may have to run

Once you’ve chrooted in, update the system.

If you get an error along the lines of qemu: uncaught target signal 4 (Illegal instruction) - core dumped, edit /etc/ld.so.preload and comment out the lines in the file.

Next, you’ll need to install and run rpi-update.

Once the update is completed, edit the /boot/config.txt file. Add these lines to the end of the file and save.

Unmount the microSD card and insert it into your Pi. Connect the appropriate pins for your Pi using your USB-to-TTL serial cable and plug it into your host. Instructions for this can be found at http://workshop.raspberrypiaustralia.com/usb/ttl/connecting/2014/08/31/01-connecting-to-raspberry-pi-via-usb/. Note that if you’re going to use an external power source, you do not need to connect the 5V pin from the serial cable. Connecting to the 5V pin while an external power source is connected may damage your Pi, so be careful!

You should then be able to access your Pi using screen (or your preferred serial client). Note that /dev/ttyUSB0 is the port attached after the cable was connected. To find out what port your USB cable is attached to, you can run dmesg | tail after you connect the cable.

If you see a blank screen, your Pi has probably already finished booting up, so just type your login username and press Enter. Alternatively, you can reboot your Pi (without disconnecting the USB cable from your host) and then you should be able to see the boot messages in the serial console before the login prompt is displayed.

Configure Pi 3 WiFi from the command line
After you’re logged in, you’ll need to configure your WLAN connection. Just edit /etc/wpa_supplicant/wpa_supplicant.conf and add the following lines replacing [networkssid] and [key] with the WiFi SSID and the access key respectively:

Save the file and then run the following commands

Next, check if the connection was successfully established. If you see inet addr after running the ifconfig command, then you’re connected to the network and you can SSH in (after raspi-config) from a different device on the network.

Enable I2C and SSH with raspi-config
With raspi-config, you can make a number of configuration changes to your Pi 3. Enabling SSH is required for remote access and I plan to use I2C to connect to an Arduino Mega in order to control the pins, so I2C has to be enabled as well. To enable both, launch raspi-config.

Then select Advanced Options, and then enable the SSH and I2C options. You can also explore the other configuration settings and modify them to suit your needs.

What now?
That’s it! I will be writing about the software I’m installing on the Pi 3 relating to my autonomous robot project over the next few posts. I will also create posts related to the PINE64 once I have the board in my hands. Hopefully, very soon!

Shopping list for parts

In anticipation of my PINE64 board arriving, I have been trying to identify items I will need for my autonomous robot project (really should come up with a name for this). Since this is pretty much my first project and I don’t have an electronics background, there are no tools nor parts lying around and I have to start from scratch. Here’s an outline of items I will be purchasing over the course of the project with pricing on some of the components to provide a basic budget estimate.

Tools

  • Basic pliers
  • Drill
  • Screwdrivers
  • Soldering kit (soldering iron, lead-free solder)
  • Third arm

Hardware

Components

  • 32GB microSD card – Amazon $10.56 / Aliexpress $12.89
  • Dagu 4 channel motor controller for the Rover 5 Chassis – Amazon $21.95
  • Flash drive, hard drive or other external USB storage
  • LEDs and resistors
  • Keyestudio MEGA 2560 R3 (an Arduino MEGA 2560 clone board) – Amazon $14.99 / Aliexpress $11
    This provides additional GPIO pins which can be used for better control of the motors using the motor controller. The plan is to connect the Arduino clone board to the PINE64 using the I2C bus.
    Male-male, male-female and female-female jumper wires
  • PINE A64+ with 1GB DDR3 RAM – $19
  • RAVPower 16750mAh portable battery pack – Amazon $31.99
  • Solderless breadboard (for prototyping)
  • USB to TTL cable – Aliexpress $1.75

PINE64 Add-on modules

  • 5MP camera module – $15.99
  • Real time clock (RTC) battery module – $2.99
  • WiFi 802.11bgn / Bluetooth 4.0 module – $12.99