The Build

I finally got around to building a new workstation which I hope should be future-proof for the next 10 years, at least. It’s actually not yet complete, as I plan to upgrade the RAM to 96GB. I went with 32GB in the mean time since the Crucial kit I went with was dirt-cheap during the 2023 Black Friday sales. I am happy with the outcome so far though.

Specs

CPUIntel Core i7-14700K 3.4GHz
MotherboardASRock Z790M-ITX WiFi
RAM32GB (2 x 16GB) Crucial Pro RAM @ 5600MT/s
GPUPowerColor AMD Radeon RX 6800 XT 16GB
Storage1x WD_BLACK SN850X 2TB (Windows drive)
1x WD_BLACK SN850X 1TB (macOS drive)

This also happens to be my first small form factor (SFF) build, and it was surprisingly fairly straightforward, even with the tricky cable management. I opted for the Lian Li Dan A4-H2O case, which is a sleek 11L SFF case. Still get decent CPU and GPU temperatures with air cooling, although the case supports AIOs with liquid cooling. For some reason, I just can’t get comfortable with the thought of any liquid in the same vicinity as expensive computer components. The CPU and GPU temperatures are pretty decent, ~60ºC and ~76ºC respectively when gaming at 1080p (spent the latter part of December playing through Phantom Liberty).

Although I successfully got macOS running on my 5+-year old AMD machine, I was unable to run the Android emulator in macOS, which I need for streamlining my development work and productivity. That was probably the major factor which motivated me to switch to Intel. I’m currently running macOS Sonoma 14.2.1 with no headaches, and it’s smooth as butter. I’ve published the OpenCore EFI on Github for anyone interested.

Expired English

I took the IELTS exam a couple of years ago as part of my plans to apply for the Canadian Express Entry programme, and the results are about to expire. It is a weird concept that I have to re-take an exam to demonstrate my competence with a language that I have been speaking since I was born. Of course, it’s the same fee for admission, which is also just as frustrating. Then again, it is something that I have to do.

I’ve also spent the past few weeks trying to decide if I should just build a new desktop computer altogether (since my AMD Ryzen 7 2700 build is over 6 years old now), or build a separate Hackintosh machine. I managed to create a cheap build that’s a spec-to-spec match for the M2 Pro Mac mini which comes in at just about $850. A fully decked out desktop replacement that I liked would’ve been about $1600 (just $400 over my initial theory-crafted Hackintosh build). I could’ve pulled the trigger on that, but Intel’s next gen processors (Meteor Lake and Arrow Lake) which are around the corner will be using a new socket platform: LGA1851, instead of LGA1700. It doesn’t seem like a great idea to splurge on a new machine when there is no viable future upgrade path. And I do need Intel, so that I can run the Android simulator on the Hackintosh build. Virtualisation software do not like AMD processors in this scenario, unfortunately.

With my desktop replacement plans pushed further into the future, here’s the final cheap Hackintosh build I’ve arrived at. I already own a 1000W PSU back from my short-lived crypto mining days, and I purchased a RX 6600 just recently for my AMD build, for full graphics acceleration support. It can be $120 – $150 cheaper if I opt to go with DDR4 memory, but I think I like it this way. Sidenote: Why are DDR5 motherboards so goddamn expensive?!

PCPartPicker Part List

TypeItemPrice
CPUIntel Core i7-13700 2.1 GHz 16-Core Processor $349.99 @ Amazon
CPU CoolerDeepcool AK400 ZERO DARK 66.47 CFM CPU Cooler $39.99 @ Amazon
MotherboardASRock Z790M-ITX WIFI Mini ITX LGA1700 Motherboard $209.99 @ Newegg
MemoryG.Skill Ripjaws S5 32 GB (2 x 16 GB) DDR5-6000 CL36 Memory $99.99 @ Amazon
StorageWestern Digital Black SN850X 1 TB M.2-2280 PCIe 4.0 X4 NVME Solid State Drive $84.99 @ Amazon
CaseMagniumGear Neo-G Mini V2 Mini ITX Tower Case $54.99 @ Newegg
Total$839.94

How I got the ACCA Diploma in Accounting and Business in 3 weeks

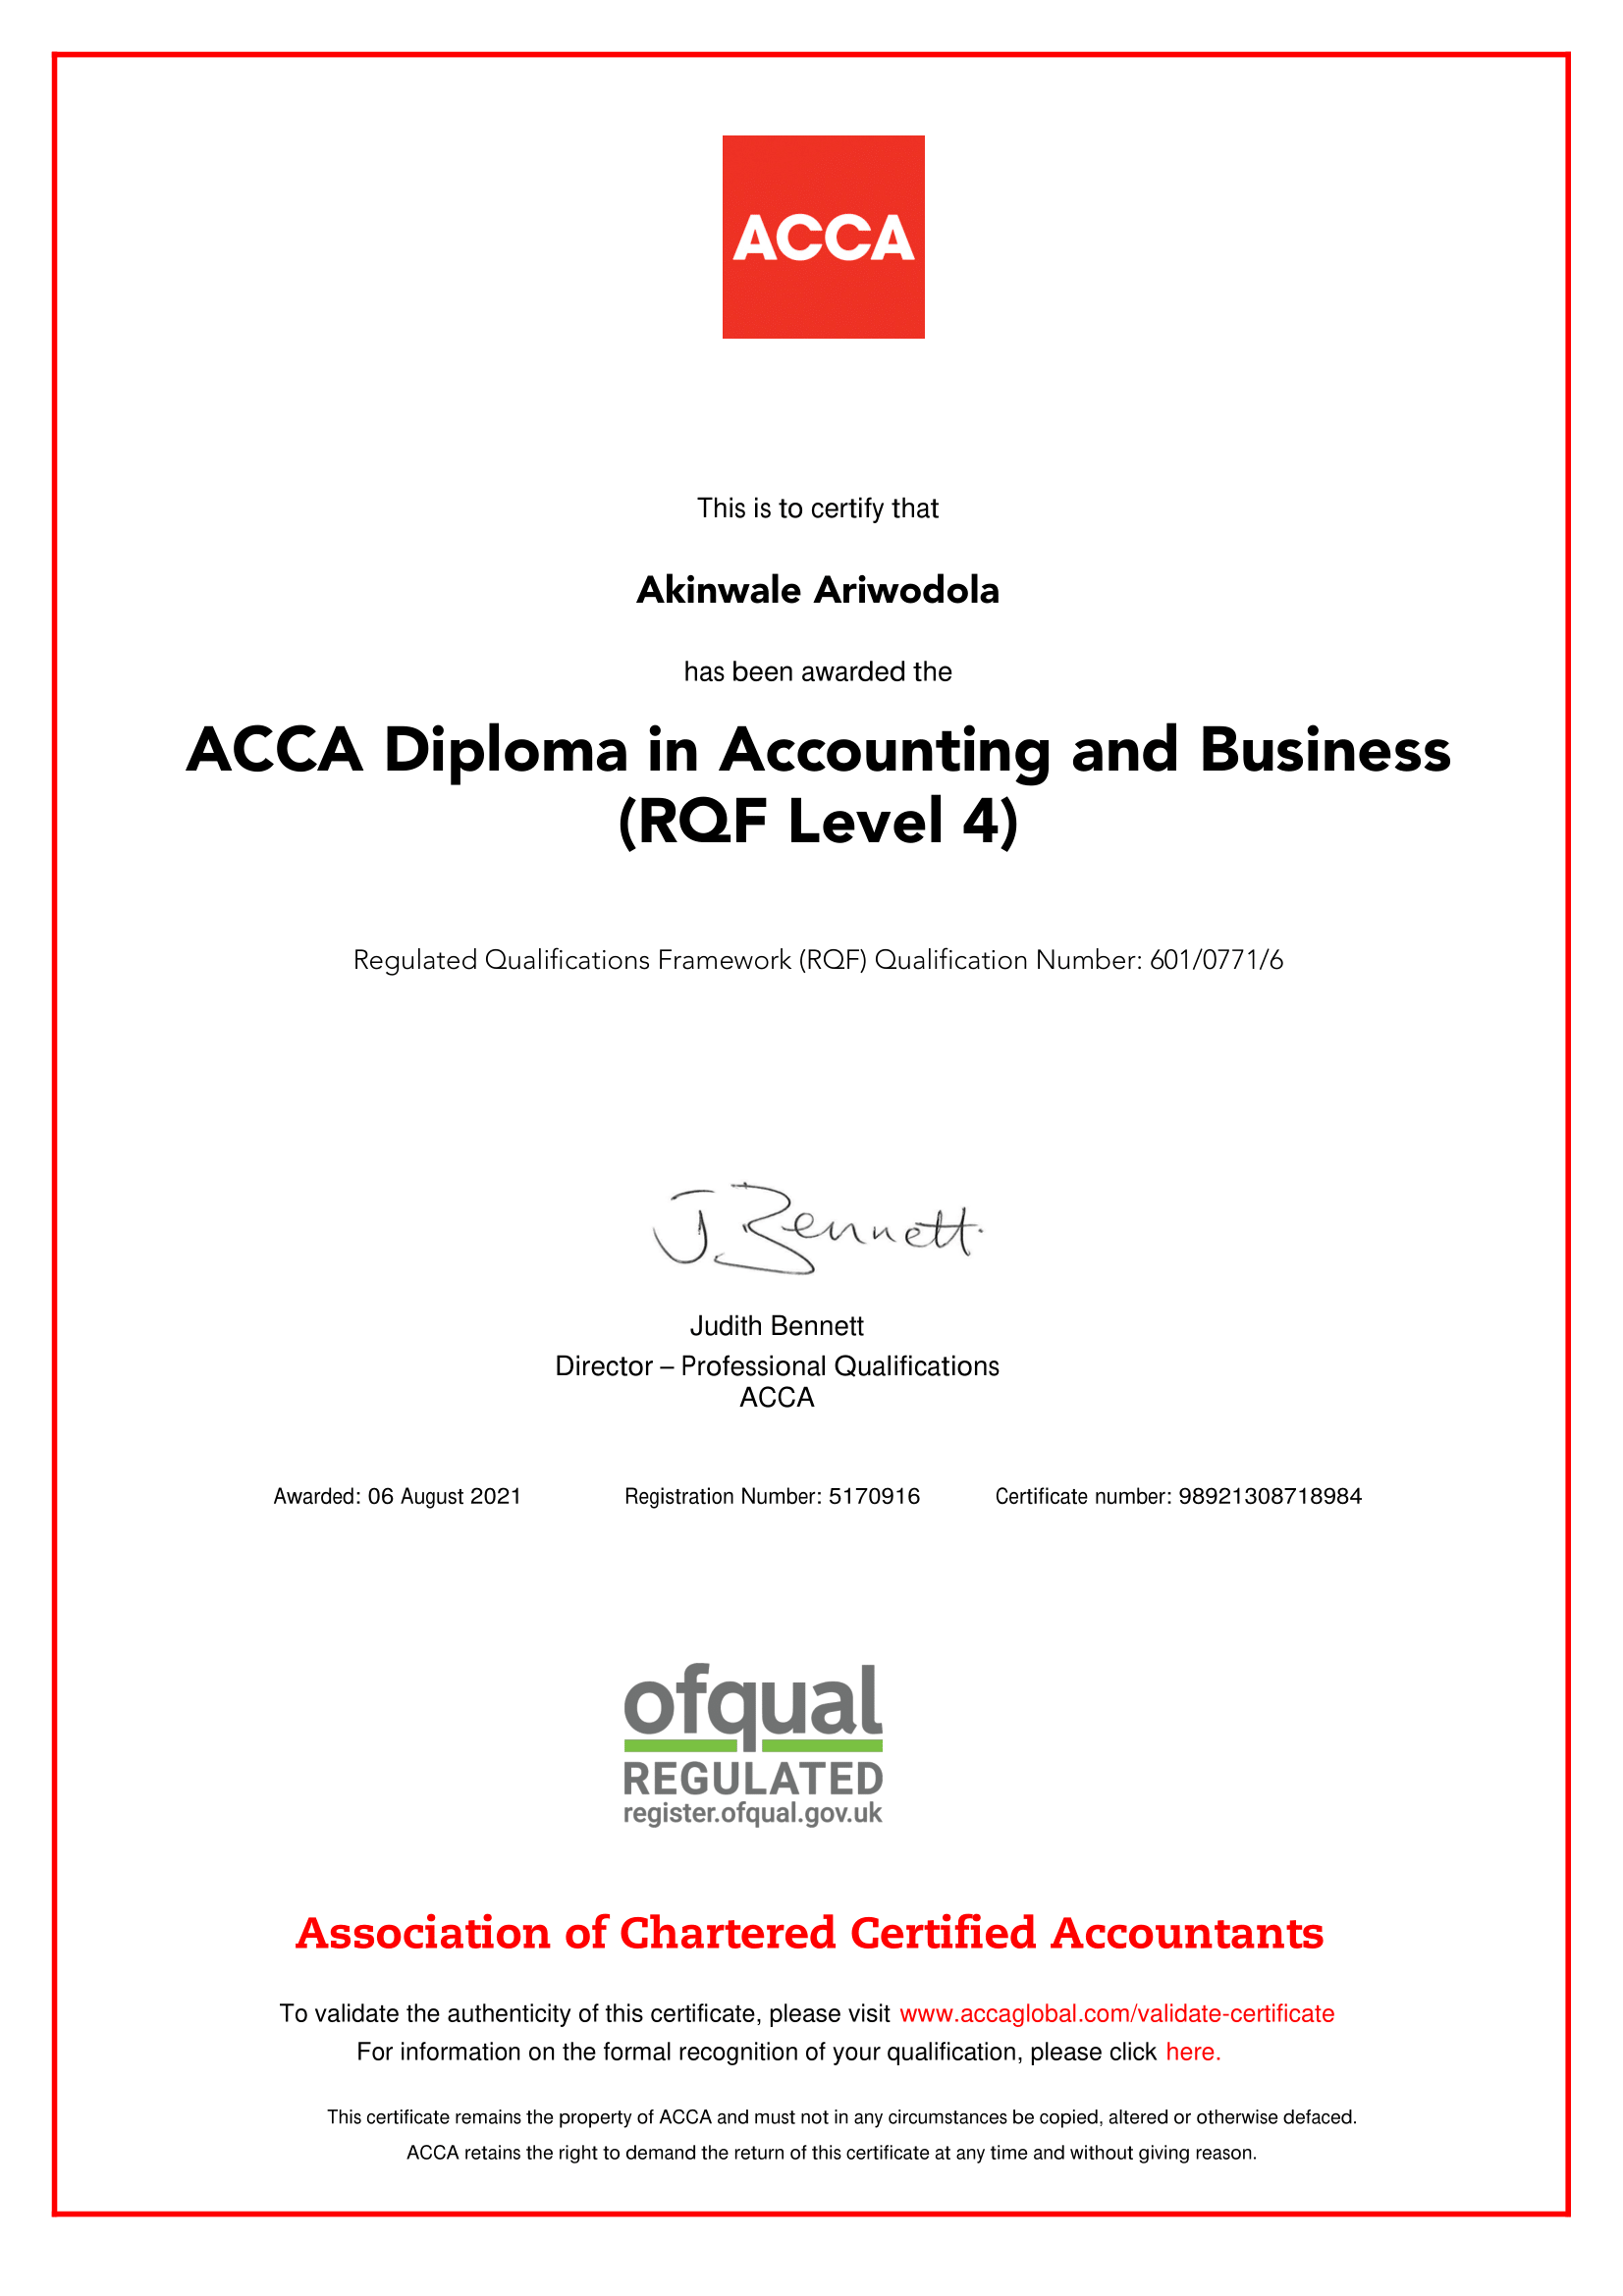
ACCA Diploma in Accounting & Business - Akinwale Ariwodola

I decided to obtain an accounting certification for a couple of personal reasons, one being that my dad advised me to do so several years ago in addition to my software work. Of course, I ignored him at the time since I didn’t think I would need to do anything else but software, but it looks like I have eventually come around. I was also quite upset by the fact that the Diploma I got from Informatics back in 2005 was pretty much useless for my purposes, so there was a bit of anger driving my determination.

After doing some research, I decided to start off with the ACCA diploma, seeing as it was possible to get it done in the shortest possible time (6 – 12 months on the ACCA website, but some individuals on various Internet forums posted they were able to get it done within a couple of months). There are 3 exams and an online module that need to be completed in order to get it done. I signed up as an ACCA student on the 15th of July using the Foundations in Accountancy (FIA) route, which cost £36, got approved on the 16th of July, finished the online module called Foundations in Professionalism the same day, and scheduled and paid for my first exam on the 23rd July.

To backtrack a little, let’s go over what the 3 exams are. Numerous posts on the Internet refer to these exams F1 to F3, but here are the actual names (they are all prefixed with F if you go through the foundation route).
F1 – FBT/BT – Business & Technology (formerly Accountant in Business)
F2 – FMA/MA – Management Accounting
F3 – FFA/FA – Financial Accounting

The 3 exams are available as on-demand computer based exams (CBE), and can be taken at any time, with a 50% pass mark on each of them, so I decided to tackle just one at a time just to test the waters. The first one I booked was the hardest one, FFA, since it had the lowest pass rate (70% as at July 2021) compared to the others. I paid $69 for the ACCA-X FFA course, and went through 10 weeks of course material within a week (over a weekend and most nights). I understood most of it and then proceeded to fail the first exam by scoring 49% (partly due to some stress caused by the British Council exam centre, which we’ll get to later, and I did not have a calculator because I wrongly assumed there would be an on-screen calculator provided by the CBE software). It turns out there are questions that tend to be worded in ways that trick you if you don’t pay attention.

One other important piece of advice that I ignored was to do practice / mock tests before the exam. I assumed since I already answered the questions at the end of every session in the course, I would be fine. I then proceeded to purchase 3 practice tests (available from the myACCA dashboard for £14) and scored 60%, 65% and 66% respectively. One thing the practice tests are really useful for is identifying where you’re likely to make mistakes and to be able to identify the trick questions. They also indicate which parts of the syllabus that you need to focus on for revision purposes. Another thing to keep in mind is that the practice tests seemed to be easier than the actual exam, but that could probably be due to the combination of questions you get from the question bank.

I decided to retake the exam on the day I failed, so I booked another session at a different centre the following Monday, July 26th and I passed with 55%. I decided to move on to FMA (second hardest with a 75% pass rate as at July 2021), paid $69 for the ACCA-X FMA course, purchased a set of 3 practice tests (again, proved useful to identify trick questions and where I was lacking) and booked a CBE exam at yet another centre (will cover reasons why later on) the following Monday, August 2nd, passed with 69%.

Finally, I decided to use the free OpenTuition course material instead of paying for the corresponding ACCA-X course for FBT, since it was the easiest of the 3 (highest pass rate). I finished the course material over 2 days, purchased another 3 practice tests just to be sure I was ready, booked a CBE exam for Thursday, August 5th and achieved a 75% score. I was transferred from the FIA (Foundations in Accountancy) path to the ACCA qualification path (you can choose to opt-out of this) with the first 3 exams marked as free exemptions as soon as my results were uploaded to the myACCA portal, and my diploma certificate got issues on August 6th.
 

CBE Centre reviews

This is more location-specific since I live in Lagos, Nigeria. I had an overall positive experience with the CBE centres except for the British Council, which was completely abysmal.

The British Council
The British Council offers the on-demand exams only 3 days in a month, it was the closest centre to home, and I already had some experience with them since I took my IELTS exam there, so booking the first exam there was a no-brainer. They were also the cheapest option. However, several things went wrong.

  1. I did not receive a confirmation email regarding my exam booking, so I had no idea whether or not the exam would hold.
  2. I got to the centre on the day of the exam by 8am, and they verified that my name was on the system. However, the exam which was supposed to start at 9am did not commence until about 11.30am. We were only just informed of technical issues about 1 hour before we started.
  3. They lost power (or turned off the generator) during the exam, which resulted in a network disconnection error and ended up terminating the CBE software (thankfully, progress was saved).
  4. The CBE software could not be relaunched immediately because the computer had a pending Windows software update. The power cut plus the wait for the update resulted in another 30 minutes of wasted time.
  5. I have not yet received my provisional result by email.

I did not have a good time, and the 49% fail was the icing on the cake.

Synergy Professionals
I retook FFA here, and the experience was fine, but they only offer exams from 12 noon, and I prefer to take exams in the morning.

The New Synergy Specialists (TNSS)
The furthest from home, and also a decent experience. I took the FMA and FBT exams here. The only complaints I have are table space was cramped, and you have to follow up to get them to email the provisional results.
 

So what did I learn?

  • Bring your own calculator.
  • The OpenTuition courses are actually pretty good, and best of all they are free (as in free beer). I only discovered OpenTuition after I had paid for the ACCA-X courses.
  • Always purchase a set of 3 practice tests for the CBE exams (they help identify where you’re likely to make mistakes and which parts of the syllabus to focus on for revision).
  • Depreciation, current ratio (I remember failing a question in the first FFA exam – I calculated with all assets and liabilities instead of just current assets and current liabilities, so I’ll never forget), variances, standard costing, financial performance measurement (I have all the formulae memorised) and more!
  • If you’re in Lagos, don’t count on the name brand of the “British Council”. Unless you’re prepared to deal with the stress, get your exams done elsewhere.
  • Don’t believe everything you read on the Internet, but we already know this. I went in with the expectation that everything would be very hard and I would require more than a month to study for each subject.


Total damage (with local currency equivalents)

  • Student registration £36 – ₦23,400
  • FFA failed attempt – ₦36,666
  • FFA successful attempt – ₦47,500
  • FMA successful attempt – ₦50,000
  • FBT successful attempt – ₦50,000
  • 3 sets of practice tests x 3 (£14 x 3 = £42) – ₦27,300
  • Optional – ACCA-X FFA course $69 – ₦30,360
  • Optional – ACCA-X FMA course $69 – ₦30,360

My total cost to certification was ₦295,586.
Total cost without failed attempts (OpenTuition courses) ₦198,200.
Total cost if you’re willing to deal with British Council’s timeline and shenanigans (OpenTuition courses) ₦160,698.
Cheapest approach (no practice tests) ₦133,398.
 

What the future holds

There are only 6 more exams in order to get the Advanced Diploma, so I’ve decided to pursue that, since I found a lot of what I’ve studied so far interesting. I already have the next exam booked, LW (GLO) – Corporate & Business Law. It’s the final on-demand CBE, as everything else is session based (March, June, September or December). It’s a mostly theoretical paper, and it’s got practice tests. Once I obtain the Advanced Diploma, I may explore taking the Strategic Professional exams yet, but I’ll decided when I get to that bridge.

Portable chargers and power banks that support passthrough charging

Keeping a single board computer or Arduino powered without interruption tends to be a requirement for several projects, examples including a home automation system, media centre or an autonomous robot. Portable chargers are very convenient and readily available at various online and brick-and-mortar electronics stores. However, not all of them support passthrough charging, which is a feature where power is provided to a connected device while plugged in to a wall socket. The only caveat here is if the device being powered consumes more power than the wall or socket AC output,

I have spent some time looking for options and here are a few brands that you can consider if you’re looking for a portable passthrough charger.

RAVPower

Most of the RAVPower portable chargers I’ve come across support passthrough charging. I personally have experience with the 16750mAh charger and I can confirm that it works great. With several good reviews from buyers on Amazon, it looks like you cannot go wrong with this option.

RAVPower Portable Charger 10400mAh
Capacity – 10400 mAh
Outputs – 2 USB Type-A (2.4A, iSmart)
Max Input – 2A
Weight – 226g (0.5lbs)
Price – $21.99

RAVPower Portable Charger 16750mAh
Capacity – 16750 mAh
Outputs – 2 USB Type-A (2.4A, iSmart)
Max Input – 2A
Weight – 303g (0.67lbs)
Price – $31.99

RAVPower Portable Charger 20100mAh
Capacity – 20100 mAh
Outputs – 2 USB Type-A, 1 USB Type-C (2.4A, iSmart, 3A)
Max Input – 2A (micro USB), 3A (USB-C)
Weight – 381g (0.84lbs)
Price – $49.99

Anker

My first portable charger was by Anker, but I soon discovered that whenever I plugged the charger to AC, the power from the USB ports was shut off. Apparently, their earlier products supported this feature, but they decided to remove it due to possible issues with the difference between the wall charger output and the input of the device being recharged (see caveat above). However, there is the 5000mAh PowerCore Fusion which is a hybrid wall and portable charger with support for passthrough charging.

Anker PowerCore Fusion 5000
Capacity – 5000 mAh
Outputs – 2 USB Type-A (2.1A / 3A)
Max Input – 2A
Weight – 190g (0.42lbs)
Price – $20.49

Aukey

I haven’t had any experience with Aukey, but they do provide a number of portable chargers that support passthrough charging and they appear to be well reviewed on Amazon.

AUKEY 10000mAh Portable Charger
Capacity – 10000 mAh
Outputs – 2 USB Type-A (2.4A)
Max Input – 2A
Weight – 198g (0.44lbs)
Price – $25.99

AUKEY 20000mAh Portable Charger
Capacity – 20000 mAh
Outputs – 3 USB Type-A, 1 USB Type-C (3A)
Max Input – 2A (micro USB), 3A (USB-C)
Weight – 379g (0.84lbs)
Price – $39.99

AUKEY 30000mAh USB-C Portable Charger
Capacity – 30000 mAh
Outputs – 2 USB Type-A, 1 USB Type-C (3A)
Max Input – 2.4A (micro USB), 3A (USB-C)
Weight – 635g (1.4lbs)
Price – $59.99

EasyAcc

This is a lesser known brand with several options that have received a significant number of good reviews on Amazon.

EasyAcc 10000mAh Power Bank
Capacity – 10000 mAh
Outputs – 2 USB Type-A (3.1A)
Max Input – 2A
Weight – 272g (0.6lbs)
Price – $19.99

EasyAcc 15000mAh Power Bank
Capacity – 15000 mAh
Outputs – 3 USB Type-A (2.4A)
Max Input – 2A
Weight – 334g (0.74lbs)
Price – $28.99

EasyAcc 20000mAh Power Bank
Capacity – 20000 mAh
Outputs – 4 USB Type-A (3.1A)
Max Input – 2A
Weight – 408g (0.9lbs)
Price – $39.99

That is quite a number of options from 4 different brands, and there are probably more that I haven’t even come across. Feel free to comment if you’ve got experience with portable passthrough chargers and you’d like to share.

Measuring PINE64 Idle Power Consumption

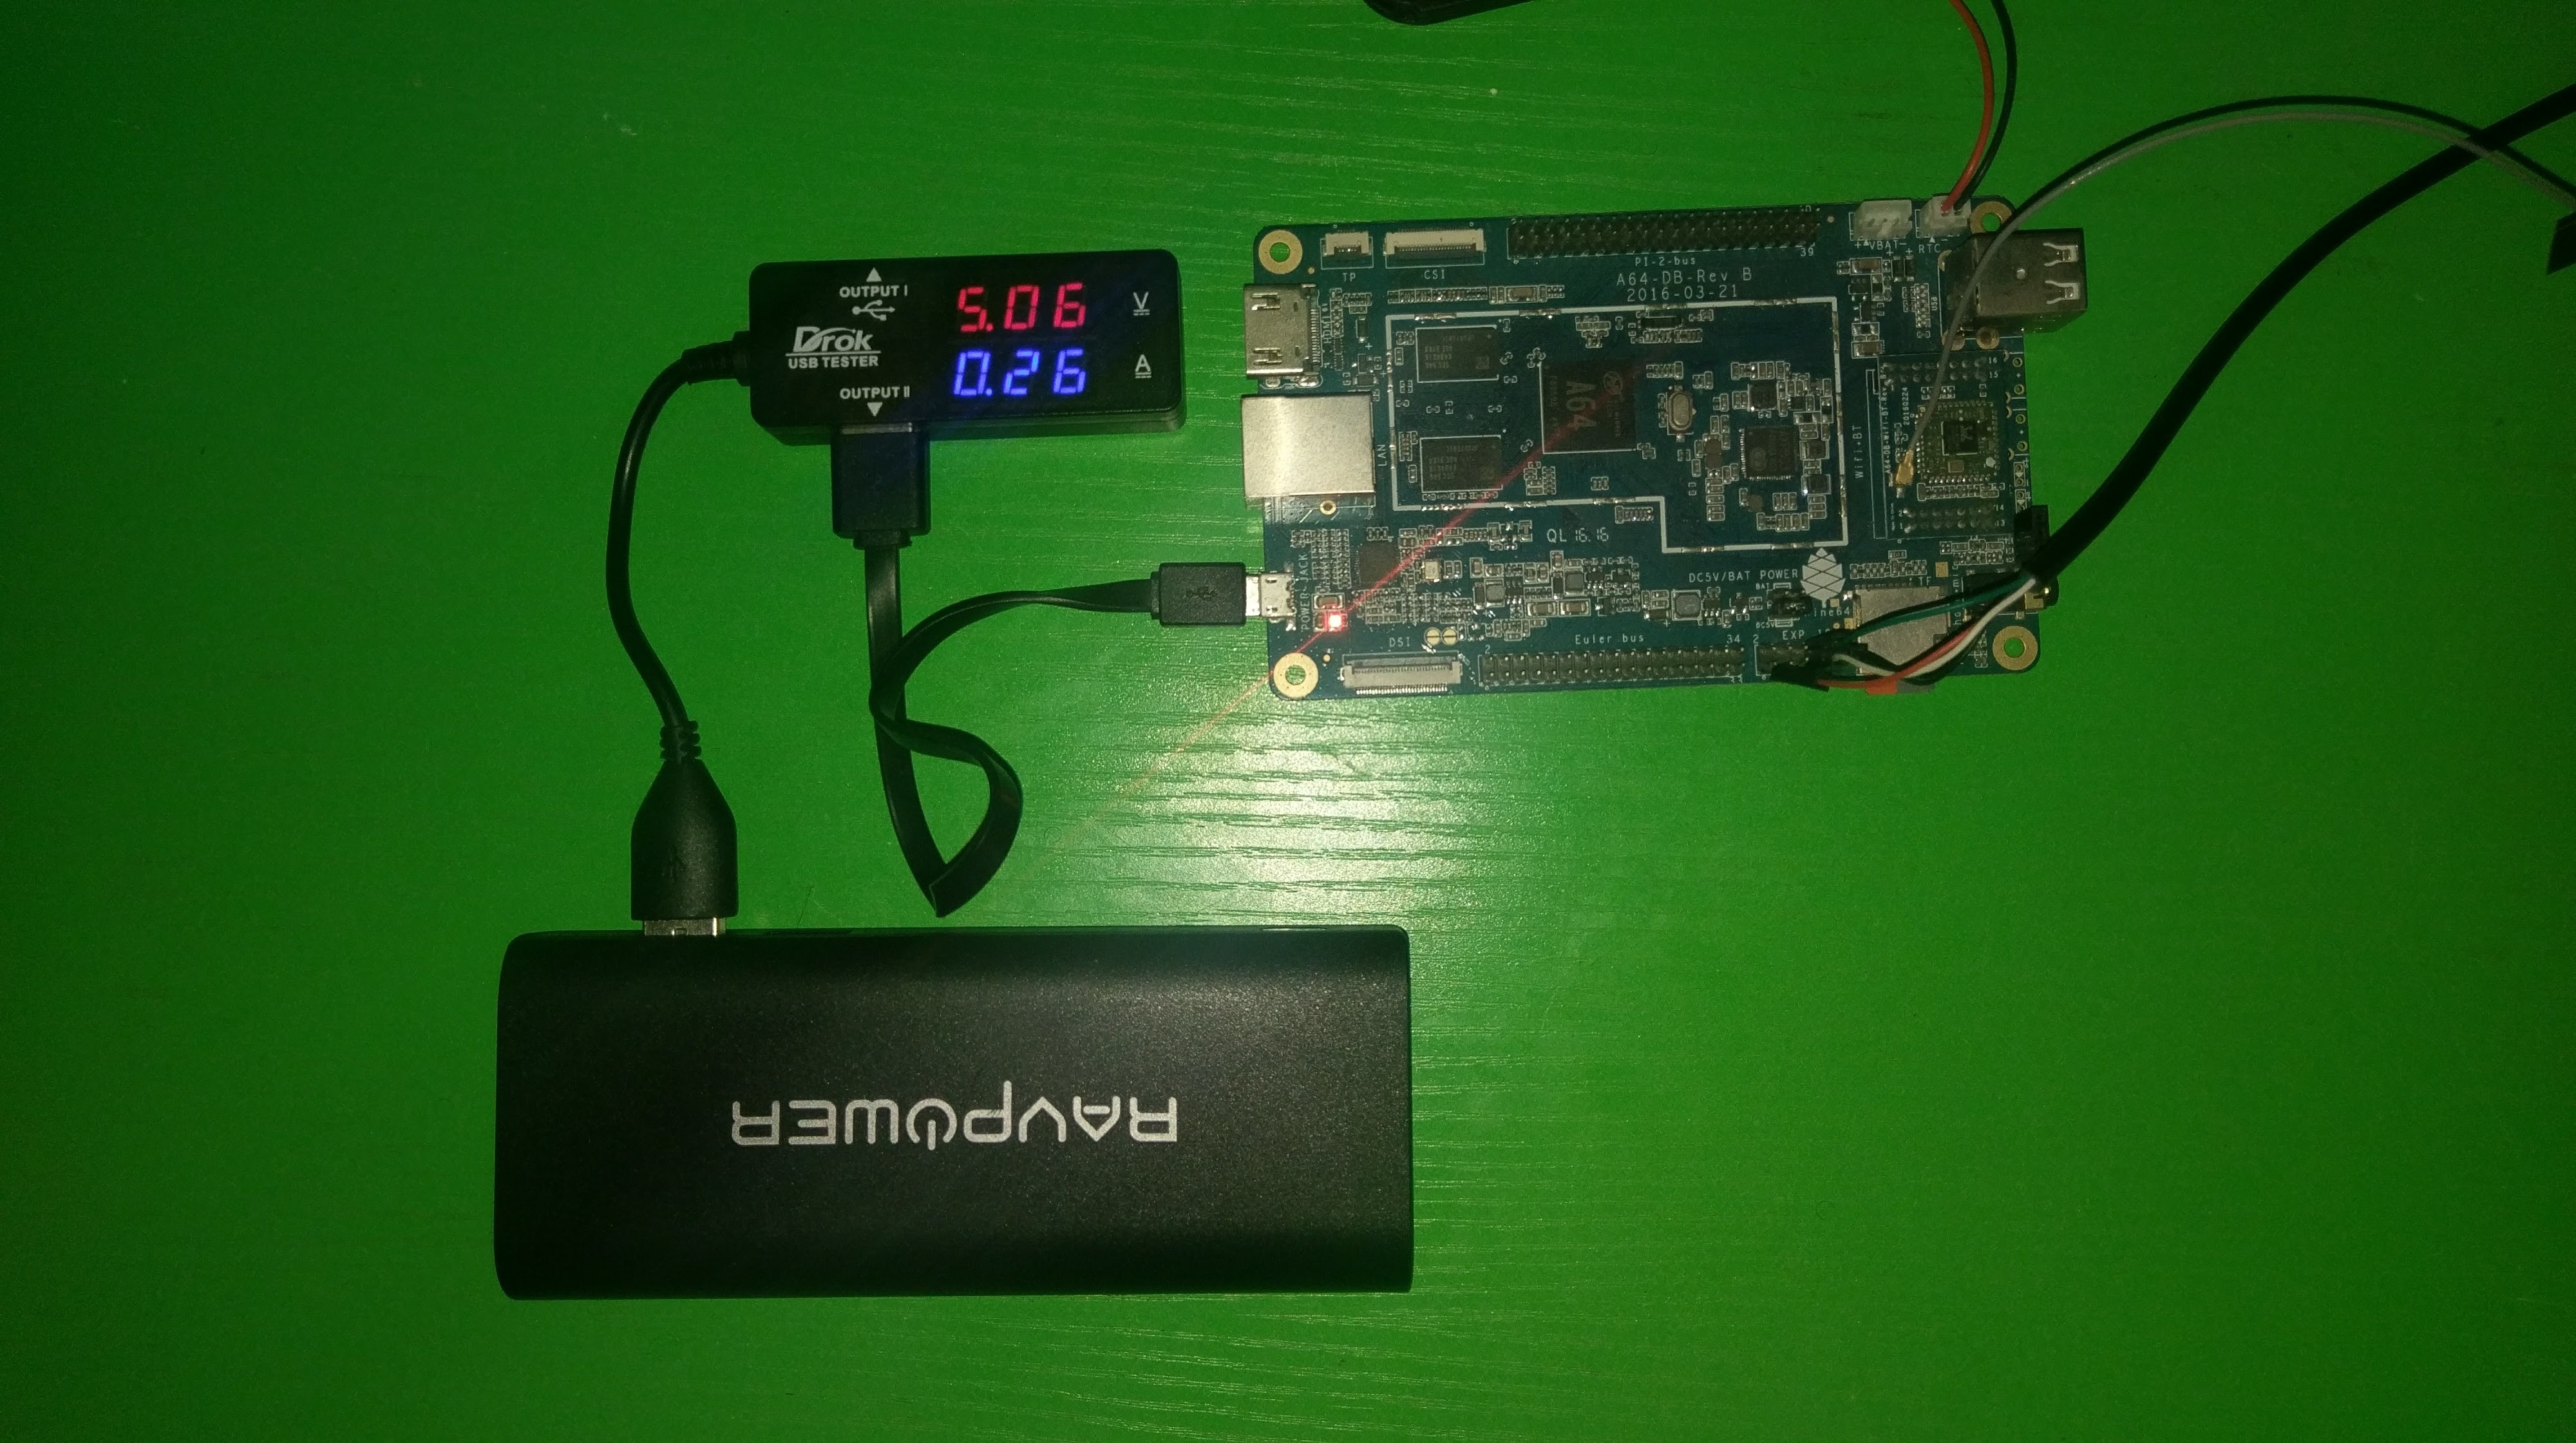
I got a DROK digital multimeter and I decided to find out just how much power the PINE64 consumes running headless.

PINE64 connected to RAVPOWER powerbank through DROK multimeter

The measurements were taken on my 1GB PINE64 running longsleep’s Ubuntu image. The measured voltage from the powerbank is 5.06V.

CPU @ 1152MHzCPU @ 480MHz
WiFi / BT module plugged in260mA (1.32W)200mA (1.01W)
WiFi / BT module removed250mA (1.27W)190mA (0.96W)

This is not by any means a proper scientific test, but it gives an idea of what to expect. Got any tips for reducing power consumption? Feel free to share them in the comments below.

The PINE64 is finally here

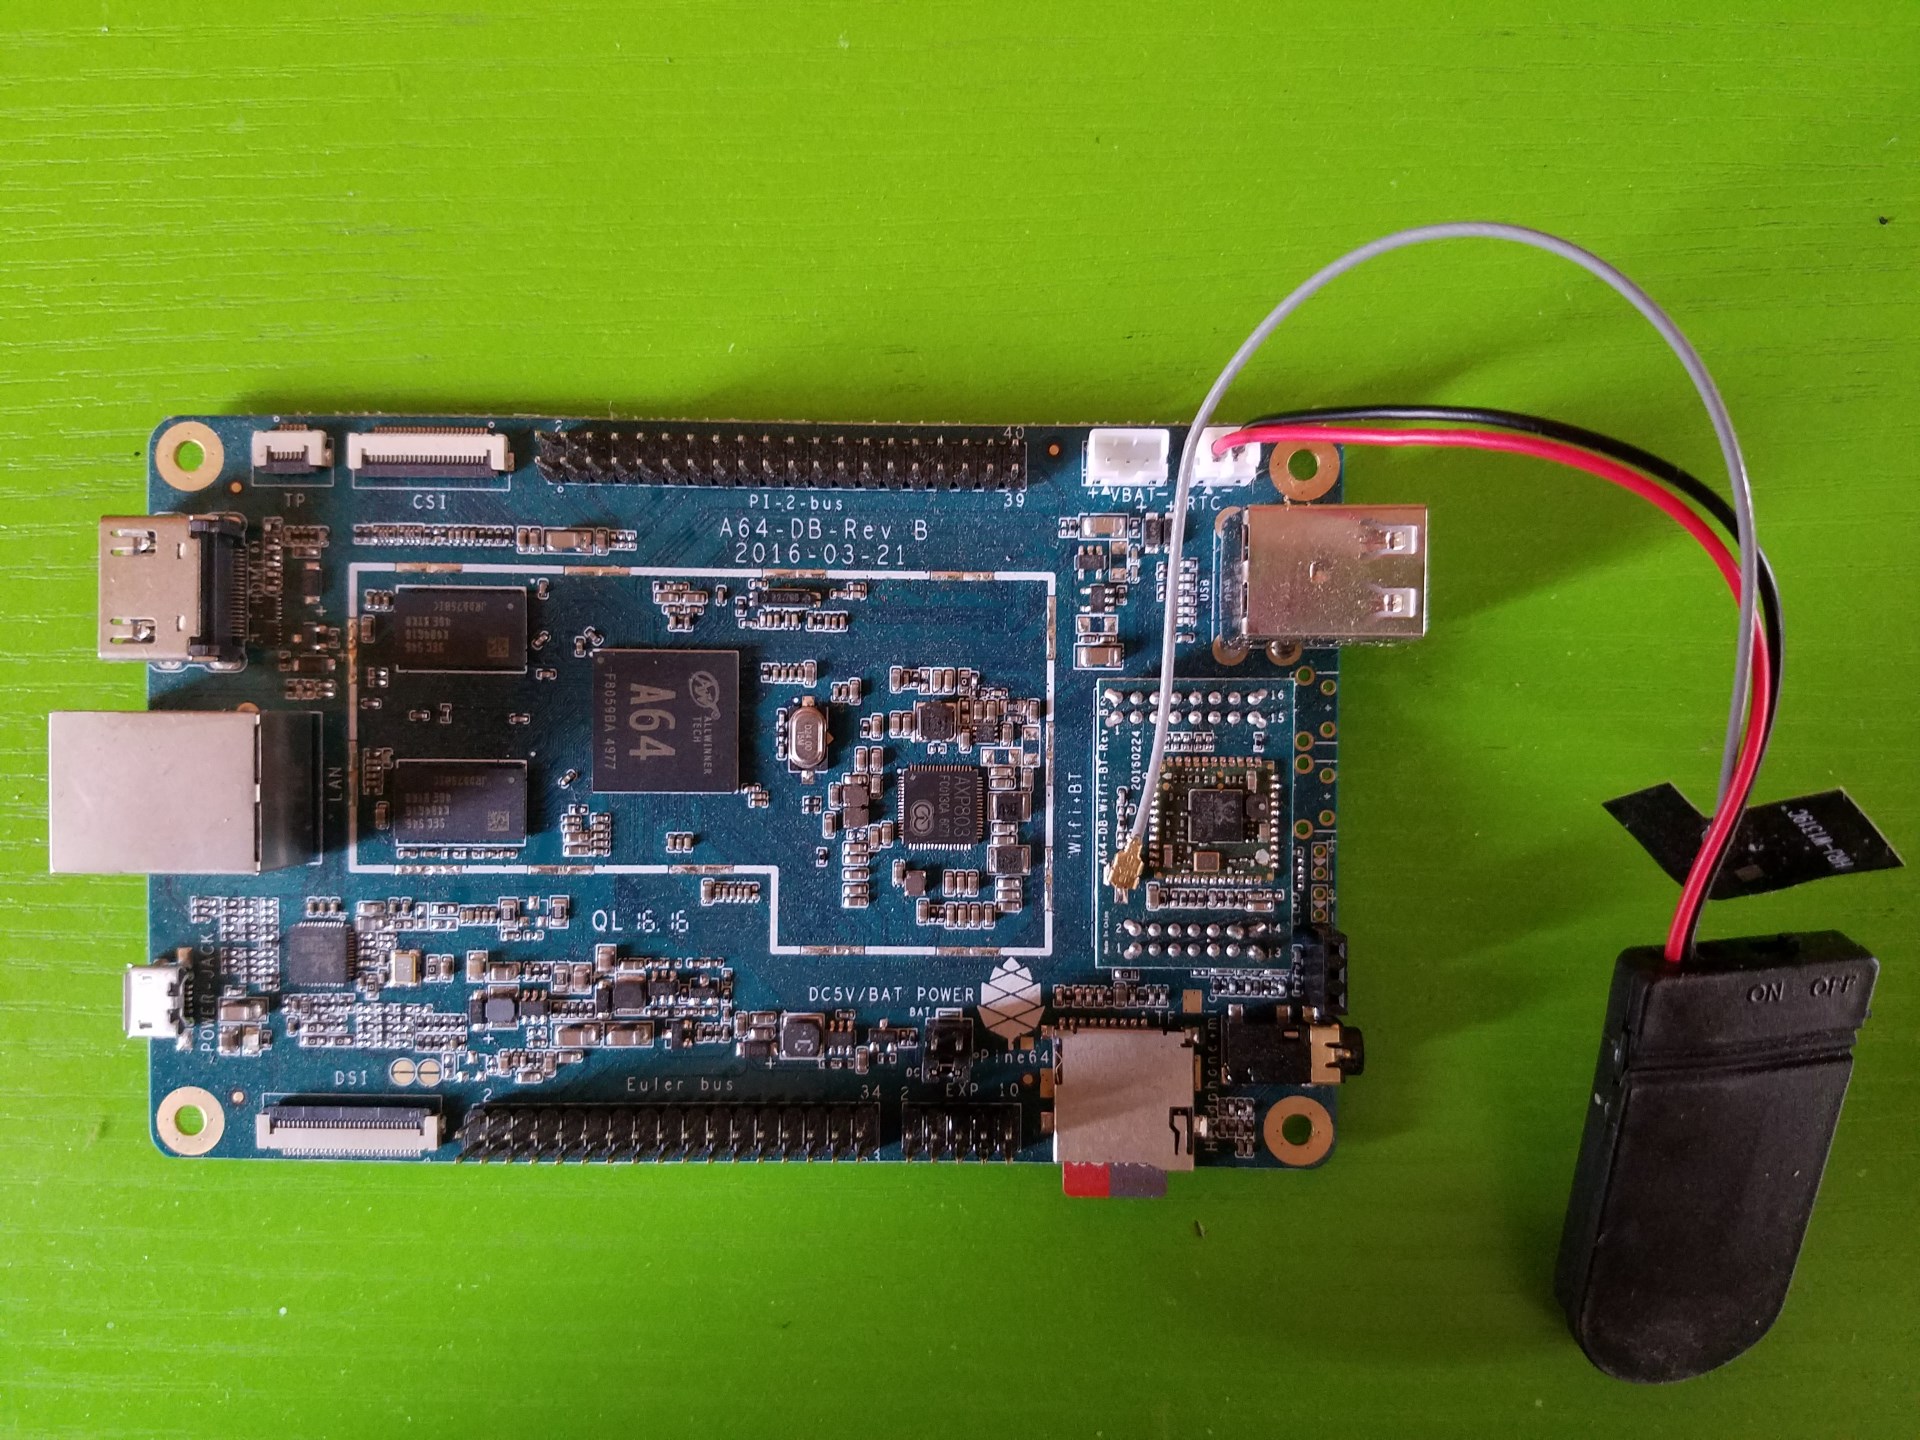
1GB PINE64 with the WiFi module and RTC battery module installed. It's huge!

I received my PINE64 yesterday and I was pretty excited after such a long wait. The following items were in the package:

  • PINE64 1GB board
  • Camera module
  • RTC battery module (which is actually bigger than I expected)
  • WiFi/Bluetooth module

They were all in good shape, and the board was not bent nor warped which I was afraid would happen after reading a few horror stories. The Pine64 is most definitely a huge board (compared to the Raspberry Pi), and the build quality also seems solid. I was able to burn the longsleep Ubuntu Xenial image to a 32GB microSD card, and since I wanted to run the board as a headless device, I mounted the microSD on my Linux box and updated the /etc/network/interfaces file to connect to my wireless network. The connection to the network was established a few seconds after providing power to the board and I was able to SSH into the device after the boot process was successfully completed.

I’ll update this post with a few pictures once I get a decent camera.

Update

1GB PINE64 with the WiFi module and RTC battery module installed. It's huge!

1GB PINE64 with the WiFi module and RTC battery module installed. It’s huge!

PINE64 side-by-side with a Raspberry Pi 3 and the Keyestudio Mega clone

PINE64 side-by-side with a Raspberry Pi 3 and the Keyestudio Mega clone

Shopping list for parts

In anticipation of my PINE64 board arriving, I have been trying to identify items I will need for my autonomous robot project (really should come up with a name for this). Since this is pretty much my first project and I don’t have an electronics background, there are no tools nor parts lying around and I have to start from scratch. Here’s an outline of items I will be purchasing over the course of the project with pricing on some of the components to provide a basic budget estimate.

Tools

  • Basic pliers
  • Drill
  • Screwdrivers
  • Soldering kit (soldering iron, lead-free solder)
  • Third arm

Hardware

Components

  • 32GB microSD card – Amazon $10.56 / Aliexpress $12.89
  • Dagu 4 channel motor controller for the Rover 5 Chassis – Amazon $21.95
  • Flash drive, hard drive or other external USB storage
  • LEDs and resistors
  • Keyestudio MEGA 2560 R3 (an Arduino MEGA 2560 clone board) – Amazon $14.99 / Aliexpress $11
    This provides additional GPIO pins which can be used for better control of the motors using the motor controller. The plan is to connect the Arduino clone board to the PINE64 using the I2C bus.
    Male-male, male-female and female-female jumper wires
  • PINE A64+ with 1GB DDR3 RAM – $19
  • RAVPower 16750mAh portable battery pack – Amazon $31.99
  • Solderless breadboard (for prototyping)
  • USB to TTL cable – Aliexpress $1.75

PINE64 Add-on modules

  • 5MP camera module – $15.99
  • Real time clock (RTC) battery module – $2.99
  • WiFi 802.11bgn / Bluetooth 4.0 module – $12.99